Showing posts with label HackRF One. Show all posts

Monday, 27 October 2014

Part One: Time for custom OTP generation hardware ?

I have been looking at how to generate good random numbers and also at the Raspberry Pi's maximum data throughputs rates using wifi (9.9MiB/s), ethernet (11.2MiB/s) and disk (22MiB/s). The Raspberry Pi is good at some things, but it is not very good at moving large amounts of data about really fast. If it was I'd probably look at some way of generating good random numbers and transferring in the data in via the GPIO pins. But even doing this, the GPIO pins have a limit of about 10MHz maybe, some testing would need to be done to see if this could work or if the data rate could be pushed higher (use more pins to transfer more bits in parallel).

I looked into using the BeagleBone Black, but it also only has 10/100 Ethernet (circa 11.2MiB/s). And if I made a custom board with the 324 BGA single core 720MHz-1GHz  Cortex-A8 CPU it probably would not have enough oomph to fully saturate the gigabit built into the TI AM3359 CPU. OK, even if it could generate OTP data at a gigabit per second rates, I could not easily push it to a disk at that rate, so maybe the chip is good enough. It does include a RNG Crypto Hardware Accelerator (/dev/hwrng), but I trust that about as much as I would trust the similar RNG in the Raspberry Pi. The AM3359 does have a 12-bit ADC 200KSPS inbuilt but that would be too slow to sample a noise source for random numbers to generate random numbers at any decent rate. And the chip are a little bit on the expensive side as well:
AM3359ZCZD72  1+ @ €31.47; 15+ @ €29.11; 50+ @ €27.14; 100+ @ €26.45 (April 2014).
AM3359BZCZA80 1+ @ €47.48; 10+ @ €45.20; 25+ @ €42.53; 50+ @ €40.11 (April 2014).
AM3358BZCZ672 1+ @ €39.60; 10+ @ €37.08; 25+ @ €34.98; 50+ @ €31.06 (April 2014).
AM3358BZCZ100 1+ @ €46.84; 10+ @ €44.61; 25+ @ €41.97; 50+ @ €39.59 (April 2014).
AM3357BZCZA80 1+ @ €41.97; 10+ @ €39.97; 25+ @ €37.60; 50+ @ €35.48 (April 2014).

Refer to "8.1.2 Device Nomenclature" in the AM335x datasheet for the exact meaning of the Suffix's.

The Airspy project is using a  LPC4370 ARM CPU which is slow at only 204MHz in comparison to a TI AM3359, but it does have one very nice feature a 12-bit 80MSPS ADC. It also has three ARM  cores a Cortex-M4 and two Cortex-M0's.There is a 100 BGA chip with 3 multiplexed ADC channels or a 256 BGA chip with 6 multiplexed ADC channels.
LPC4370FET100 1+ @ €10.77; 10+ @  €9.46; 25+ @ €8.43 ; 50+ @ €7.19 (April 2014)
LPC4370FET256 1+ @ €14.85; 10+ @ €12.97; 25+ @ €11.58; 50+ @ €9.86 (April 2014)

The airspy project was spawned into existence by the HackRF project which originally used a LPC4330,  well now a LPC4320 (no need to 10/100 Ethernet). This chip has the advantage of not being a BGA device, it is a 144 pin QFP, but the data, in the case of the HackRF One,  is transferred from a separate ADC to the ARM using SGPIO.

LPC4320FBD144,551 1+ @ €8.78; 10+ @ €7.55; 50+ @ €6.19; 100+ @ €4.20 (April 2014)
LPC4330FBD144,551 1+ @ €9.89; 10+ @ €8.50; 50+ @ €6.98; 100+ @ €4.43 (April 2014)


The complexity of using SGPIO and the cost of a separate high speed ADC using a LPC4320, makes the  LPC4370 with its inbuilt 80MSPS ADC look like the best overall cheapest solution for what I want to do.

The fact that the Airspy has a 80dB Spurious-free dynamic range that I could use this to amplify the noise signal from a reverse biased zanier diode or a npn transistor acting as a  germanium diode is nice. Because the noise signal needs about 40dB of gain to be usable. One problem with using the Airspy is that it is only sampling at 20MSPS and not 80MSPS. But as a open software test platform, that could be used to see if making a dedicated board with the LPC4370 BGA chip is feasible or not and it is a good easy first step. The Airspy will have two high speed ADC inputs (using a u.FL connector) for the two spare multiplexed ADC channels on the 100 BGA chip. After the initial tests these ADC ports could be used with a custom firmware to test sampling at 80MSPS, 40MSPS per channel from two shielded secure noise sources.

The main advantage of doing some testing using an Airspy would be not having to design and build a fully custom development board with this 100-256 BGA chip. Ok in the short term it may cost a bit more, but if it does not work I would still have a very useful SDR receiver. Unfortunately there is no way to push more then about 40MiB/sec through USB 2.0. So even though I could be sampling 80MSPS at 12bits (120MiB/sec), I would need to concentrate this entropy by a factor of three. And that is provisional on there being enough spare CPU headroom available to do so before transferring the sampled noise to a PC. The fact that the chip supports SIMD (ARM NEON) may make this just about possible with a good pinch of lateral thinking.


Monday, 1 September 2014

Part Two: HackRF One - Howto use a Raspberry Pi to upgrade the Firmware on a HackRF One

Update: September 2014. There is now a temporary way to perform a HackRF One firmware upgrade in Windows: using a special modified firmware https://homes.cs.washington.edu/~supersat/hackrf-tools-cpld-update-hack.zip 1. Install ARM firmware, 2. power cycle hackrf, 3. flash CPLD firmware, 4. power cycle hackrf.


Since currently there is no way to upgrade the firmware on a HackRF One from Microsoft Windows, I though these commands may be useful for others, who have a Raspberry Pi and want to update their firmware. These instructions are generic enough that they should work with most other Debian based Linux distributions as well (you may need to type "sudo apt-get install pkg-config" in addition to the commands below).

The RPi is good enough to upgrade the firmware on the HackRF One with no issues, but it would not be easy to use the HackRF One for anything else. It does not have enough CPU power for DSP (no NEON instruction set), it does not have enough USB bandwidth for more than about 6MSPS, and writing IQ data to anywhere but a RAM disk will fail with USB timeouts. It is really not a great platform to use a H1 on. Although with some custom niche software that used the GPU for FFT's it may be possible to just about do something useful, but it would take a lot of work.

Below are the commands I used to upgrade the ARM firmware and CPLD firmware from version git-44df9d1 to 2014.08.1. The RELEASENOTES for this binary firmware, downloaded from sourceforge said that the latest hackrf-tools and libhackrf must be used to install, and that is what I did below:

As usual, I have censored any identifying information about my personal hardware.

pi@raspberrypi ~ $ lsusb
Bus 001 Device 002: ID 0424:9512 Standard Microsystems Corp.
Bus 001 Device 001: ID 1d6b:0002 Linux Foundation 2.0 root hub
Bus 001 Device 003: ID 0424:ec00 Standard Microsystems Corp.
Bus 001 Device 004: ID 1d50:6089 OpenMoko, Inc.
pi@raspberrypi ~ $ mkdir src
pi@raspberrypi ~ $ cd src
pi@raspberrypi ~/src $ git clone https://github.com/mossmann/hackrf.git
Cloning into 'hackrf'...
remote: Counting objects: 9045, done.
remote: Total 9045 (delta 0), reused 0 (delta 0)
Receiving objects: 100% (9045/9045), 24.04 MiB | 1.04 MiB/s, done.
Resolving deltas: 100% (6329/6329), done.
pi@raspberrypi ~/src $ cd hackrf/host
pi@raspberrypi ~/src/hackrf/host $ mkdir build
pi@raspberrypi ~/src/hackrf/host $ cd build/
pi@raspberrypi ~/src/hackrf/host/build $ sudo apt-get install cmake
Reading package lists... Done
Building dependency tree
Reading state information... Done
The following extra packages will be installed:
  cmake-data emacsen-common libxmlrpc-core-c3
The following NEW packages will be installed:
  cmake cmake-data emacsen-common libxmlrpc-core-c3
0 upgraded, 4 newly installed, 0 to remove and 85 not upgraded.
Need to get 5,766 kB of archives.
After this operation, 13.6 MB of additional disk space will be used.
Do you want to continue [Y/n]? Y
Get:1 http://mirrordirector.raspbian.org/raspbian/ wheezy/main libxmlrpc-core-c3 armhf 1.16.33-3.2 [146 kB]
Get:2 http://mirrordirector.raspbian.org/raspbian/ wheezy/main emacsen-common all 2.0.5 [20.9 kB]
Get:3 http://mirrordirector.raspbian.org/raspbian/ wheezy/main cmake-data all 2.8.9-1 [1,359 kB]
Get:4 http://mirrordirector.raspbian.org/raspbian/ wheezy/main cmake armhf 2.8.9-1 [4,240 kB]
Fetched 5,766 kB in 4s (1,328 kB/s)
Selecting previously unselected package libxmlrpc-core-c3.
(Reading database ... 69052 files and directories currently installed.)
Unpacking libxmlrpc-core-c3 (from .../libxmlrpc-core-c3_1.16.33-3.2_armhf.deb) ...
Selecting previously unselected package emacsen-common.
Unpacking emacsen-common (from .../emacsen-common_2.0.5_all.deb) ...
Selecting previously unselected package cmake-data.
Unpacking cmake-data (from .../cmake-data_2.8.9-1_all.deb) ...
Selecting previously unselected package cmake.
Unpacking cmake (from .../cmake_2.8.9-1_armhf.deb) ...
Processing triggers for man-db ...
Setting up libxmlrpc-core-c3 (1.16.33-3.2) ...
Setting up emacsen-common (2.0.5) ...
Setting up cmake-data (2.8.9-1) ...
Install cmake-data for emacs
Setting up cmake (2.8.9-1) ...
pi@raspberrypi ~/src/hackrf/host/build $ sudo apt-get install libusb-1.0-0-dev
Reading package lists... Done
Building dependency tree
Reading state information... Done
The following NEW packages will be installed:
  libusb-1.0-0-dev
0 upgraded, 1 newly installed, 0 to remove and 85 not upgraded.
Need to get 184 kB of archives.
After this operation, 962 kB of additional disk space will be used.
Get:1 http://mirrordirector.raspbian.org/raspbian/ wheezy/main libusb-1.0-0-dev armhf 2:1.0.11-1 [184 kB]
Fetched 184 kB in 5s (32.3 kB/s)
Selecting previously unselected package libusb-1.0-0-dev.
(Reading database ... 69752 files and directories currently installed.)
Unpacking libusb-1.0-0-dev (from .../libusb-1.0-0-dev_2%3a1.0.11-1_armhf.deb) ...
Setting up libusb-1.0-0-dev (2:1.0.11-1) ...
pi@raspberrypi ~/src/hackrf/host/build $ cmake .. -DINSTALL_UDEV_RULES=ON
-- The C compiler identification is GNU 4.6.3
-- The CXX compiler identification is GNU 4.6.3
-- Check for working C compiler: /usr/bin/gcc
-- Check for working C compiler: /usr/bin/gcc -- works
-- Detecting C compiler ABI info
-- Detecting C compiler ABI info - done
-- Check for working CXX compiler: /usr/bin/c++
-- Check for working CXX compiler: /usr/bin/c++ -- works
-- Detecting CXX compiler ABI info
-- Detecting CXX compiler ABI info - done
-- Check if the system is big endian
-- Searching 16 bit integer
-- Looking for sys/types.h
-- Looking for sys/types.h - found
-- Looking for stdint.h
-- Looking for stdint.h - found
-- Looking for stddef.h
-- Looking for stddef.h - found
-- Check size of unsigned short
-- Check size of unsigned short - done
-- Using unsigned short
-- Check if the system is big endian - little endian
-- Found PkgConfig: /usr/bin/pkg-config (found version "0.26")
-- checking for module 'libusb-1.0'
--   found libusb-1.0, version 1.0.11
-- Found LIBUSB: /usr/lib/arm-linux-gnueabihf/libusb-1.0.so
-- Looking for include file pthread.h
-- Looking for include file pthread.h - found
-- Looking for pthread_create in pthreads
-- Looking for pthread_create in pthreads - not found
-- Looking for pthread_create in pthread
-- Looking for pthread_create in pthread - found
-- Found Threads: TRUE
-- Configuring done
-- Generating done
-- Build files have been written to: /home/pi/src/hackrf/host/build
pi@raspberrypi ~/src/hackrf/host/build $ make
Scanning dependencies of target hackrf
[ 11%] Building C object libhackrf/src/CMakeFiles/hackrf.dir/hackrf.c.o
/home/pi/src/hackrf/host/libhackrf/src/hackrf.c: In function ‘hackrf_set_freq_explicit’:
/home/pi/src/hackrf/host/libhackrf/src/hackrf.c:783:2: warning: this decimal constant is unsigned only in ISO C90 [enabled by default]
Linking C shared library libhackrf.so
[ 11%] Built target hackrf
Scanning dependencies of target hackrf-static
[ 22%] Building C object libhackrf/src/CMakeFiles/hackrf-static.dir/hackrf.c.o
/home/pi/src/hackrf/host/libhackrf/src/hackrf.c: In function ‘hackrf_set_freq_explicit’:
/home/pi/src/hackrf/host/libhackrf/src/hackrf.c:783:2: warning: this decimal constant is unsigned only in ISO C90 [enabled by default]
Linking C static library libhackrf.a
[ 22%] Built target hackrf-static
Scanning dependencies of target hackrf_cpldjtag
[ 33%] Building C object hackrf-tools/src/CMakeFiles/hackrf_cpldjtag.dir/hackrf_cpldjtag.c.o
Linking C executable hackrf_cpldjtag
[ 33%] Built target hackrf_cpldjtag
Scanning dependencies of target hackrf_info
[ 44%] Building C object hackrf-tools/src/CMakeFiles/hackrf_info.dir/hackrf_info.c.o
Linking C executable hackrf_info
[ 44%] Built target hackrf_info
Scanning dependencies of target hackrf_max2837
[ 55%] Building C object hackrf-tools/src/CMakeFiles/hackrf_max2837.dir/hackrf_max2837.c.o
Linking C executable hackrf_max2837
[ 55%] Built target hackrf_max2837
Scanning dependencies of target hackrf_rffc5071
[ 66%] Building C object hackrf-tools/src/CMakeFiles/hackrf_rffc5071.dir/hackrf_rffc5071.c.o
Linking C executable hackrf_rffc5071
[ 66%] Built target hackrf_rffc5071
Scanning dependencies of target hackrf_si5351c
[ 77%] Building C object hackrf-tools/src/CMakeFiles/hackrf_si5351c.dir/hackrf_si5351c.c.o
Linking C executable hackrf_si5351c
[ 77%] Built target hackrf_si5351c
Scanning dependencies of target hackrf_spiflash
[ 88%] Building C object hackrf-tools/src/CMakeFiles/hackrf_spiflash.dir/hackrf_spiflash.c.o
Linking C executable hackrf_spiflash
[ 88%] Built target hackrf_spiflash
Scanning dependencies of target hackrf_transfer
[100%] Building C object hackrf-tools/src/CMakeFiles/hackrf_transfer.dir/hackrf_transfer.c.o
Linking C executable hackrf_transfer
[100%] Built target hackrf_transfer
pi@raspberrypi ~/src/hackrf/host/build $ sudo make install
[ 11%] Built target hackrf
[ 22%] Built target hackrf-static
[ 33%] Built target hackrf_cpldjtag
[ 44%] Built target hackrf_info
[ 55%] Built target hackrf_max2837
[ 66%] Built target hackrf_rffc5071
[ 77%] Built target hackrf_si5351c
[ 88%] Built target hackrf_spiflash
[100%] Built target hackrf_transfer
Install the project...
-- Install configuration: ""
-- Installing: /usr/local/lib/pkgconfig/libhackrf.pc
-- Installing: /etc/udev/rules.d/53-hackrf.rules
-- Installing: /usr/local/lib/libhackrf.so.0.3.0
-- Installing: /usr/local/lib/libhackrf.so.0
-- Installing: /usr/local/lib/libhackrf.so
-- Installing: /usr/local/lib/libhackrf.a
-- Installing: /usr/local/include/libhackrf/hackrf.h
-- Installing: /usr/local/bin/hackrf_max2837
-- Removed runtime path from "/usr/local/bin/hackrf_max2837"
-- Installing: /usr/local/bin/hackrf_si5351c
-- Removed runtime path from "/usr/local/bin/hackrf_si5351c"
-- Installing: /usr/local/bin/hackrf_transfer
-- Removed runtime path from "/usr/local/bin/hackrf_transfer"
-- Installing: /usr/local/bin/hackrf_rffc5071
-- Removed runtime path from "/usr/local/bin/hackrf_rffc5071"
-- Installing: /usr/local/bin/hackrf_spiflash
-- Removed runtime path from "/usr/local/bin/hackrf_spiflash"
-- Installing: /usr/local/bin/hackrf_cpldjtag
-- Removed runtime path from "/usr/local/bin/hackrf_cpldjtag"
-- Installing: /usr/local/bin/hackrf_info
-- Removed runtime path from "/usr/local/bin/hackrf_info"
pi@raspberrypi ~/src/hackrf/host/build $ sudo ldconfig
pi@raspberrypi ~/src/hackrf/host/build $ sudo udevadm control --reload-rules
pi@raspberrypi ~/src/hackrf/host/build $ hackrf_info
hackrf_open() failed: HACKRF_ERROR_NOT_FOUND (-5)
(I pressed the blue reset button on the hackrf)
pi@raspberrypi ~/src/hackrf/host/build $ hackrf_info
Found HackRF board.
Board ID Number: 2 (HackRF One)
Firmware Version: git-44df9d1
Part ID Number: 0xa000cb3c 0x00724f45
Serial Number: 0x00000000 0x00000000
0x         0x        

pi@raspberrypi ~/src/hackrf/host/build $ cd
pi@raspberrypi ~ $ mkdir firmware
pi@raspberrypi ~ $ cd firmware
pi@raspberrypi ~/firmware $ wget http://sourceforge.net/projects/hackrf/files/hackrf-2014.08.1.tar.xz/download
--2014-09-01 22:05:58--  http://sourceforge.net/projects/hackrf/files/hackrf-2014.08.1.tar.xz/download
Resolving sourceforge.net (sourceforge.net)... 216.34.181.60
Connecting to sourceforge.net (sourceforge.net)|216.34.181.60|:80... connected.
HTTP request sent, awaiting response... 302 Found
Location: http://downloads.sourceforge.net/project/hackrf/hackrf-2014.08.1.tar.xz?r=&ts=1409605559&use_mirror=cznic [following]
--2014-09-01 22:05:59--  http://downloads.sourceforge.net/project/hackrf/hackrf-2014.08.1.tar.xz?r=&ts=1409605559&use_mirror=cznic
Resolving downloads.sourceforge.net (downloads.sourceforge.net)... 216.34.181.59
Connecting to downloads.sourceforge.net (downloads.sourceforge.net)|216.34.181.59|:80... connected.
HTTP request sent, awaiting response... 302 Found
Location: http://cznic.dl.sourceforge.net/project/hackrf/hackrf-2014.08.1.tar.xz [following]
--2014-09-01 22:05:59--  http://cznic.dl.sourceforge.net/project/hackrf/hackrf-2014.08.1.tar.xz
Resolving cznic.dl.sourceforge.net (cznic.dl.sourceforge.net)... 217.31.202.30, 2001:1488:ffff::30
Connecting to cznic.dl.sourceforge.net (cznic.dl.sourceforge.net)|217.31.202.30|:80... connected.
HTTP request sent, awaiting response... 200 OK
Length: 14376904 (14M) [application/octet-stream]
Saving to: `download'

100%[=====================================================================================================================================================================>] 14,376,904  2.64M/s   in 7.0s

2014-09-01 22:06:07 (1.96 MB/s) - `download' saved [14376904/14376904]

pi@raspberrypi ~/firmware $ mv download hackrf-2014.08.1.tar.xz
pi@raspberrypi ~/firmware $ unxz hackrf-2014.08.1.tar.xz
pi@raspberrypi ~/firmware $ tar xf hackrf-2014.08.1.tar
pi@raspberrypi ~/firmware $ cd hackrf-2014.08.1/firmware-bin

(The next command will flash the firmware on the HackRF One, it would be good idea to make sure that it does not loose power)
pi@raspberrypi ~/firmware/hackrf-2014.08.1/firmware-bin $ hackrf_spiflash -w hackrf_one_usb_rom_to_ram.bin
File size 20292 bytes.
Erasing SPI flash.
Writing 256 bytes at 0x000000.
Writing 256 bytes at 0x000100.
Writing 256 bytes at 0x000200.
Writing 256 bytes at 0x000300.
Writing 256 bytes at 0x000400.
Writing 256 bytes at 0x000500.
Writing 256 bytes at 0x000600.
Writing 256 bytes at 0x000700.
Writing 256 bytes at 0x000800.
Writing 256 bytes at 0x000900.
Writing 256 bytes at 0x000a00.
Writing 256 bytes at 0x000b00.
Writing 256 bytes at 0x000c00.
Writing 256 bytes at 0x000d00.
Writing 256 bytes at 0x000e00.
Writing 256 bytes at 0x000f00.
Writing 256 bytes at 0x001000.
Writing 256 bytes at 0x001100.
Writing 256 bytes at 0x001200.
Writing 256 bytes at 0x001300.
Writing 256 bytes at 0x001400.
Writing 256 bytes at 0x001500.
Writing 256 bytes at 0x001600.
Writing 256 bytes at 0x001700.
Writing 256 bytes at 0x001800.
Writing 256 bytes at 0x001900.
Writing 256 bytes at 0x001a00.
Writing 256 bytes at 0x001b00.
Writing 256 bytes at 0x001c00.
Writing 256 bytes at 0x001d00.
Writing 256 bytes at 0x001e00.
Writing 256 bytes at 0x001f00.
Writing 256 bytes at 0x002000.
Writing 256 bytes at 0x002100.
Writing 256 bytes at 0x002200.
Writing 256 bytes at 0x002300.
Writing 256 bytes at 0x002400.
Writing 256 bytes at 0x002500.
Writing 256 bytes at 0x002600.
Writing 256 bytes at 0x002700.
Writing 256 bytes at 0x002800.
Writing 256 bytes at 0x002900.
Writing 256 bytes at 0x002a00.
Writing 256 bytes at 0x002b00.
Writing 256 bytes at 0x002c00.
Writing 256 bytes at 0x002d00.
Writing 256 bytes at 0x002e00.
Writing 256 bytes at 0x002f00.
Writing 256 bytes at 0x003000.
Writing 256 bytes at 0x003100.
Writing 256 bytes at 0x003200.
Writing 256 bytes at 0x003300.
Writing 256 bytes at 0x003400.
Writing 256 bytes at 0x003500.
Writing 256 bytes at 0x003600.
Writing 256 bytes at 0x003700.
Writing 256 bytes at 0x003800.
Writing 256 bytes at 0x003900.
Writing 256 bytes at 0x003a00.
Writing 256 bytes at 0x003b00.
Writing 256 bytes at 0x003c00.
Writing 256 bytes at 0x003d00.
Writing 256 bytes at 0x003e00.
Writing 256 bytes at 0x003f00.
Writing 256 bytes at 0x004000.
Writing 256 bytes at 0x004100.
Writing 256 bytes at 0x004200.
Writing 256 bytes at 0x004300.
Writing 256 bytes at 0x004400.
Writing 256 bytes at 0x004500.
Writing 256 bytes at 0x004600.
Writing 256 bytes at 0x004700.
Writing 256 bytes at 0x004800.
Writing 256 bytes at 0x004900.
Writing 256 bytes at 0x004a00.
Writing 256 bytes at 0x004b00.
Writing 256 bytes at 0x004c00.
Writing 256 bytes at 0x004d00.
Writing 256 bytes at 0x004e00.
Writing 68 bytes at 0x004f00.

(The next command flashs the CPLD in the HackRF One, it would be a good idea to make sure that it does not loose power) 
pi@raspberrypi ~/firmware/hackrf-2014.08.1/firmware-bin $ hackrf_cpldjtag -x hackrf_cpld_default.xsvf
File size 37629 bytes.
LED1/2/3 blinking means CPLD program success.
LED3/RED steady means error.

Wait message 'Write finished' or in case of LED3/RED steady, Power OFF/Disconnect the HackRF.
Write finished.
Please Power OFF/Disconnect the HackRF.
pi@raspberrypi ~/firmware/hackrf-2014.08.1/firmware-bin $
(LED1/2/3 are the three LED's starting at the antenna)
pi@raspberrypi ~/firmware/hackrf-2014.08.1/firmware-bin $ hackrf_info
Found HackRF board.
Board ID Number: 2 (HackRF One)
Firmware Version: 2014.08.1
Part ID Number: 0xa000cb3c 0x00724f45
Serial Number: 0x00000000 0x00000000 0x         0x       
pi@raspberrypi ~/firmware/hackrf-2014.08.1/firmware-bin $


Tuesday, 6 May 2014

Part One: HackRF One - Questions and Answers

I saw on IRC (#hackrf @ freenode) today that some prototype KS backers had received their GreatScott Gadgets HackRF One. Some were asking for quick tests to check that they were good to go and others were having problems, I though that I would make a quick log of the problems, queries along with their corresponding solutions and .suggestions. And add a few extra notes of my own, if I am able. I have removed all sources of questions and answers to protect peoples privacy (what little is left of it these days).

If you are currently scratching your head, because you have never heard of a HackRF before, then you should probably watch the Kickstarter video to find out more.

I'll probably sort these random questions and answers into some sort of logical order when there is enough of them, Hardware, Software, GNU Radio, RF fundamentals, .... but for now I'll just leave them mixed up higgledy-piggledy in the order that they were asked.

Problem    1: "hackrf_info" command is hanging
(VMWare 10; Host OS Windows 8.1 Enterprise; Guest OS Ubuntu Linux 14, ). 
Solution   1: Booted from a GNURadio DVD, hackrf_info responds perfectly
http://gnuradio.org/redmine/projects/gnuradio/wiki/GNURadioLiveDVD
Extra info  1: I'm not sure if anyone has been able to get HackRF working in any vmware/virtualbox on a windows host OS. We don't know yet whether or not there is any hope for VM on Windows OS.  My guess is it may work (but perhaps at a reduced maximum sample rate) if we fix some firmware USB bugs. 

Question  2: Is the Preferred OS Linux, should I even try to use it on Windows?
Answer    2: Linux is HackRF's happy place, but there are people who have made it work under Windows.

Question  3: Is there any functional testing you can recommend performing ?
Answer    3: Listen to a FM radio station.
Extra info  3: Software to do this, and more, can be downloaded for Windows from:http://sdrsharp.com/ and for Linux: from http://gqrx.dk/ (gqrx requires GNU Radio)

Question  4: What about telescopic antenna? I guess that comes with the final unit?
Answer    4: Yes. the ANT500 were not ready in time for the prototype shipment, but they were ready in time for the default Kickstarters.

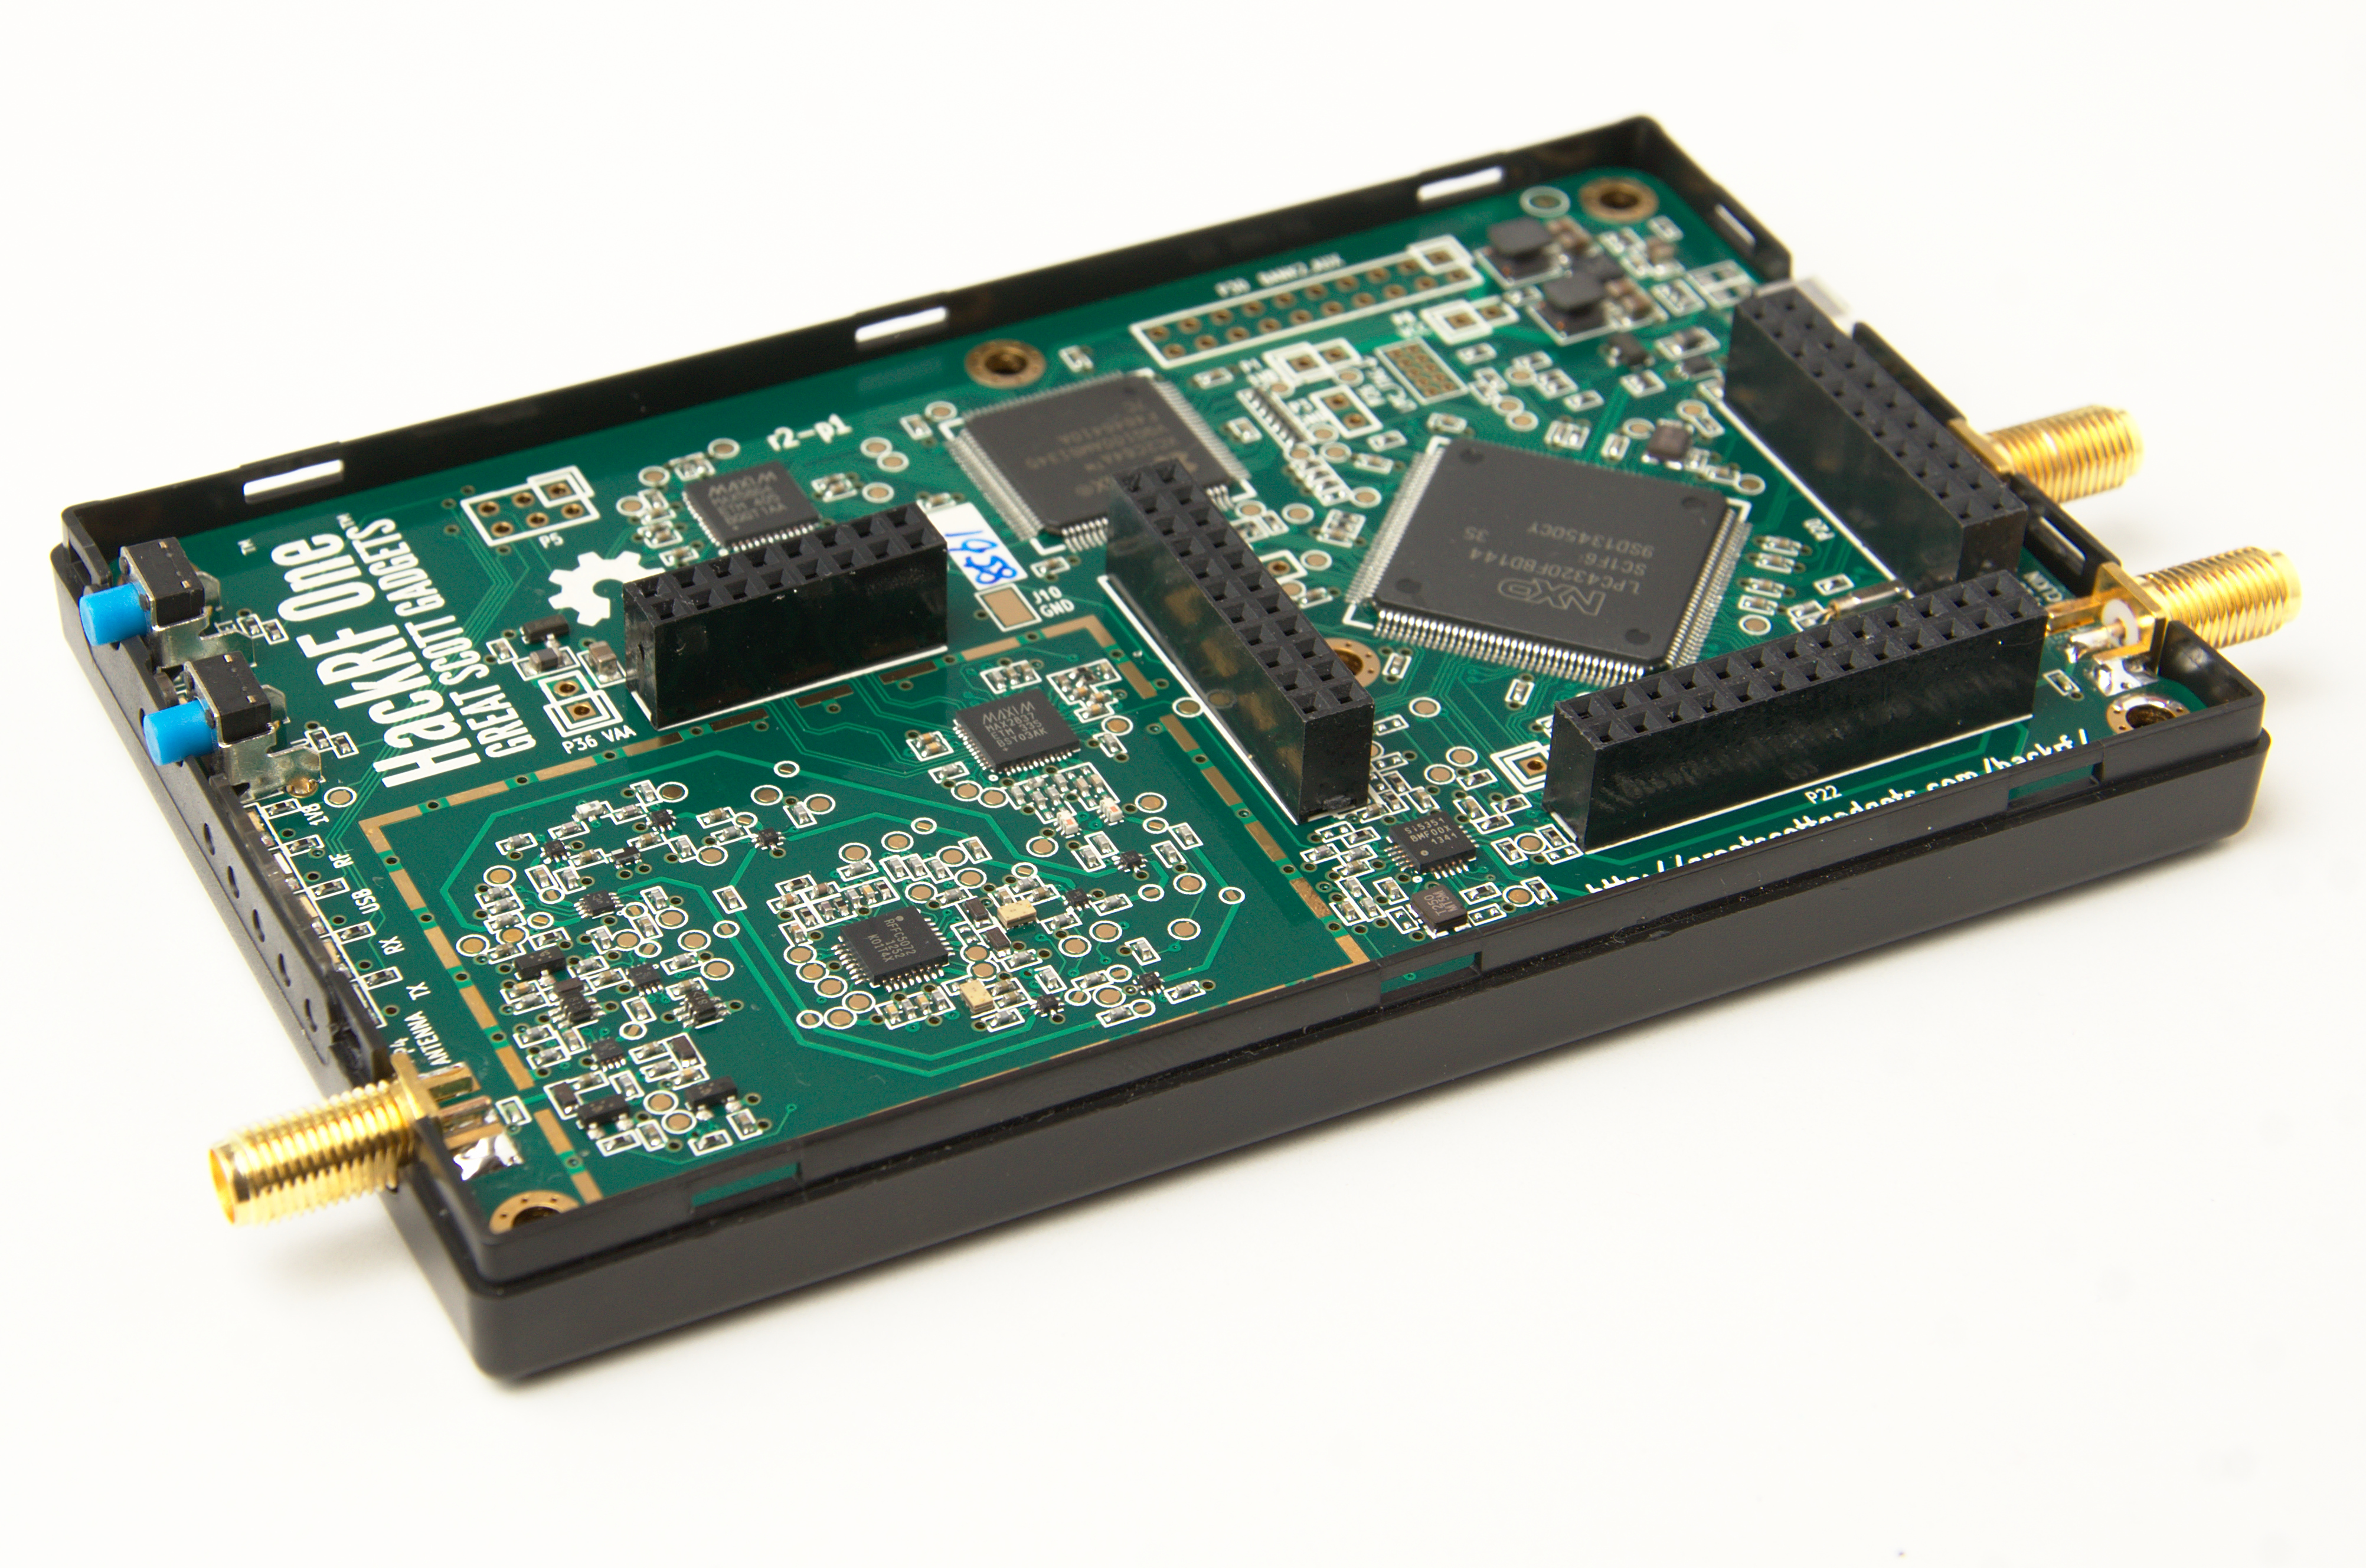
Question  5: Why the rectangle outline of pads near antenna? looks like a shield is missing?
Answer    5: There is an optional RF shield you can install if you want.

Question  6: Using GNU Radio Companion 3.7.2.1,  I can't get the osmocom source to see the HackRF One.  It shows an error message: "Source - out(0) Port is not connected."
Answer    6: "Source - out(0) Port is not connected" doesn't mean it's not detected, it's a gnuradio error message which means that the blocks' output is connected nowhere in the flowgraph within GRC. You need to connect the Source to the next block in the flow or a Sink.

Question  7:  Is this correct ? I run lsusb in verbose and it shows
Bus 001 Device 007: ID 1d50:6089 OpenMoko, Inc.
Couldn't open device, some information will be missing
Answer    7: The warning about missing USB info is due to some info being missing on the HackRF. This will probably be fixed in a later firmware revision. If it shows up on a lsusb, then all should be fine (or a "lsusb -t" if you want to check that it is plugged into a 480Mbit/sec USB 2.0 HighSpeed port on your computer). http://wiki.openmoko.org/wiki/USB_Product_IDs shows that 1d50:6089 is indeed a "HackRF One SDR".
Extra info 7:At the moment all that lsusb under Linux knows is that the vendor code is owned by "OpenMoko, Inc.", it does not know that the device is a HackRF One (yet) in /var/lib/usbutils/usb.ids. I'm sure that this will be added in a later version of the usbutils package, once it is added to the list on http://www.linux-usb.org/

Question  8: Will the final version have a RF shield over the analogue section of the board ?
Answer    8: To save cost it was dropped, but you can just buy the parts and install them yourself.
Extra info 8: From the HackRF One Bill of Materials the following two "Do Not Place" parts would be the RF shield.
J2;RF-SHIELD-FRAME;Laird;BMI-S-230-F-R;BOARD SHIELD 2INX1.5IN FRAME;DNP;;;;
J3;RF-SHIELD-COVER;Laird;BMI-S-230-C;BOARD SHIELD 2INX1.5IN COVER;DNP;;;;
The Frame is soldered to the board and the cover clips on to the frame to complete the RF shield but still allow future access to the parts under the shield if required.

Queation  9: Does the length of an antenna matter ?
Answer    9:Yes it does, in an ideal world it should be one full, 3/4, 5/8, a 1/2 or a 1/4 wavelength of the frequency that you want to tune into.
So for FM radio (88MHz-108MHz), the middle frequency is 98,000,000Hz and the speed of light is 300,000,000 meters/second [lambda=c/f]  the full wavelength length would be approximately be 3 meters (10 feet), the half wavelength would be 1.5 meters (5 feet) and the quarter wavelength would be 750 mm (2 feet 6 inches).
For WiFi on the 2.4GHz industrial, scientific and medical band 2.400 GHz to 2.500 GHz midpoint would be 2 450 000 000Hz, so the full wavelength would be about 122 mm (4.8 inches), half would be 61 mm (2.4 inches) and a quarter would be 30 mm (1.2 inches).
The rule of thumb is the higher the frequency the shorter the antenna and the lower the frequency the longer the antenna needed.
A 10MHz signal needs a 1/4 wavelength dipole antenna of length 7.5 meters (24 feet 7 inches).
Where as a 6GHz signal needs a 1/4 wavelength dipole antenna of length 12.5 mm (half an inch).
 Extra info  9: I always think of the antennas as a form of sympathetic resonance in tuning forks that if the length is close you will get near maximum power transfer. And I also think of it as a filter as well, that attenuates signals that are either side of the right frequency, a bit like a swing.

Question 10:  Is there a way to get rid of the DC spike in GNURadio ?
Answer   10: Short answer no, the DC spike is there and there is little you can do to get rid of it. But you do not need to, you just tune slightly above or slightly below the frequency that you actually want, by lets say one MHz and then use a Xlating FIR Filter block to shift the captured spectrum down or up by one MHz to avoid the DC offset spike in your baseband signal. Here is an example: http://www.sharebrained.com/2013/06/15/wireless-microphones-and-hackrf/

Problem    11: Looking for some advice on how to reduce the noise on a HackRF One running the latest firmware. I am experiencing a lot of noise.on FM radio stations that are clear as a bell using a rtlsdr dongle with the exact same software and antenna, but the HackRF One has very poor reception.
Solution   11: Make sure your host software is at latest version. All software was removed and gnuradio and gqrx were both built from the latest source. And now it works awesome!, smooth, clean and clear. no more garbled noise.
Extra info 11: There was a majorish design change/upgrade in the firmware  where I and Q were changed from unsigned to signed this is done in the CPLD instead of on the host computer now, so less CPU is needed by the host computer now. This happened in March 2014, so any software older than April 2014 will basically show noise instead of signal with this firmware upgrade.

Question 12: What are the dimensions of the HackRF-One ? (AKA - Will it fit in this X by Y by Z metal box, to shield external RF interference).
Answer   12: The PCB of the HackRF-One is 120 mm x 75 mm

Problem  13: The HackRF One can be seen with a lsusb 'ID 1d50:6089 OpenMoko, Inc.'. But with the delivered firmware on the HackRF One, the latest GNURadio and HackRF tools installed, as root I run hackrf_info and get the following error message "hackrf_open() failed: HACKRF_ERROR_NOT_FOUND (-5)".
Solution 13:  Uninstall, verify total removal (find /usr -name "*hackrf*" -print), and reinstall. It is possible that an old library is getting linked in.

Question 14: What is the input impedance of the HackRF antenna port ?
Answer   14: 50 ohms

Question 15: How fast can the HackRF, in theory anyhow, switch from TX to RX or vica versa ?
Answer   15: The RX/TX turn-around time hasn't been optimized yet, but it should be under 100 microseconds, not milliseconds. That would be achievable when controlled by the microcontroller; USB would add some latency if it is controlled by the host computer. The implications of adding too much delay vary considerably by application. For FRS two-way radio, the USB latency should be no problem at all. For 802.11, it would be a problem specifically because acknowledgement (ACK) packets need to be transmitted in a timely fashion; a possible workaround might be implementing ACKs on the microcontroller while implementing data packets on the host computer.

Question 16: How can I in GRC (GNU Radio Companion) use the HackRF One as both a sink(TX) and a source(RX)
Answer   16: Looking through the source code for gr-osmocom, it looks like it does not currently support rx/tx switching with HackRF. The sink block is only 786 lines long.  It looks like it wouldn't take too much to add tx/rx switching to it. But building and tearding down the whole TX chain at each on/off seems very slow and a bad idea. The lib supports tx on/off and rx on/off. There must be a better way.  Right now 'tx on' happens in the constructor for the sink, and that should probably be changed so that 'tx on' happens when there is data in the tx queue and 'tx off' when the queue is empty. But can you have the same device opened twice, once in RX and once in TX ? The lib seems to handle these as mutually exclusive states.  we are either in rx or in tx.  so there would need to be some coordination between the sink and source blocks......

Question 17: How do I get SDRSharp to work on Windows with the HackRF One ? I just can not get it to work. It is not seen or all I get is noise.
Answer   17:  
  1. Download and install: Zadiag http://zadig.akeo.ie/
  2. Plug your HackRF One into any USB 2.0 High Speed port on your computer.
  3. Run Zadiag and click on Options and select “List All Devices”.
  4. Choose the one that says “HackRF One”.
  5. In the box to the right of the green arrow make sure “WinUSB” is chosen - not libusb or libusbk. The big button underneath will say “Replace Driver” or “Reinstall Driver”. Before you proceed make sure the USBID matches the VID/PID of the HackRF One ( 1D50 6089 - See: http://wiki.openmoko.org/wiki/USB_Product_IDs )
  6. Download and install SDRSharp from http://sdrsharp.com/ any version newer than r1261 (15 May 2014) should be good (samples from unsigned to signed 8bit to conform to HackRF's convention)
  7. Some people suggest editing SDRSharp.exe.Config (it is in the same directory as SDRSharp.exe on your PC, right click on the SDRSharp icon and "open file location") and adding the following lines to the appSettings section:
        <add key="HackRFLNAGain" value="3" />
        <add key="HackRFVGAGain" value="3" />
        <add key="HackRFExternalAmp" value="True" />
    (sharebrained[HackRF port-a-pack] suggests the following settings with a modest antenna in <1GHz bands, RF:0, LNA/IF:16, 24 or 32, and BB/VGA:16 to 40)
  8. Run SDRSharp, tune to the FM band and smile.You can only change the gain settings, when the start button has been pressed in SDR#.
N.B. If you insert the HackRf One into a different USB port you may have to use Zadig again. It seems that you can change which driver is loaded depending on the USB port used. 
When changing the sampling rate in SDR# I have found that the HackRF stops working for me (probably best to leave it at 20MSPS and zoom in anyhow). I end up pressing Stop in SDR#, Press the blue reset button on the HackRF One, waiting about 3 seconds, and then pressing start/play in SDR#.

Question   18: How can I upgrade the ARM firmware and CPLD firmware on my HackRF One from Microsoft Windows ?
Answer     18: You currently can not, but if you have a Raspberry Pi you could upgrade the firmware(s). The instructions will work from most Debian based Linux distributions.
Extra info 18: Most flash devices are only rated for 3000 writes per block before failure, so flashing is not something that you want to do continually. It is the second part of the HackRF that can easily break without due care, the first being overloading the rx path with more than -5dBm power.
Update     18:  September 2014. There is now a temporary way to do a HackRF One upgrade on Windows: using https://homes.cs.washington.edu/~supersat/hackrf-tools-cpld-update-hack.zip 1. Install ARM firmware, 2. power cycle hackrf, 3. flash CPLD firmware, 4. power cycle hackrf.
Update     18:  If firmware 2015.07.2 (2015-07-24) or later is installed, this should work on all Windows machines using the latest hackrf host tools.

Question   19: What is the strong signal at 204, 408, 612, 816, 1020, 1224, and 1428MHz?
Answer     19: The NXP LPC4320 ARM CPU in the HackRF is clocked at 204MHz so these 'birdie''s are due to the clock signal being picked up by the antenna, or directly in the analogue part of the circuit.

Question   20: I found a grc file on the Internet for gnuradio 3.6,can I convert it to work with gnuradio 3.7 ?
Answer     20: Read http://gnuradio.org/redmine/projects/gnuradio/wiki/Move_3-6_to_3-7/ where there is mention of a script http://nathanwest.us/grc_to_37.sh for converting simple 3.6 to 3.7  grc files.


Question   21: I need to generate a cfile, how do I do this with the HackRF.
Answer     21: The default output from hackrf_transfer is 8 bit signed chars in pairs (Inphase and Quadriture), a cfile is in the same general format but is floats (usually scaled up by 8,000,000). So to convert you read in the signed char values, multiply by 8 million  and write them out to a new file, see below. For comparison the default output of a rtl-sdr is 8 bit unsigned chars, see here for more info about the rtl-sdr flowgraph.


Question   22: In gqrx how do I tune to a frequency lower than 30MHz ?
Answer     22: In gqrx under "input controls" put a tick in the "Ignore limits" checkbox to tune down to DC and up to 7250MHz.

Question   23: What is the lowest sample rate that I can set the HackRF One to ?
Answer     23: The lowest baseband filter width in the  MAX2837 chip is 1.75MHz, so the minimum sample rate is 2MSPS. 
Extra info 23: There are 16 available filters in this chip 1.75MHz , 2.25MHz, 3.5MHz, 5, 5.5MHz, 6MHz, 7MHz, 8MHz, 9MHz, 10MHz, 12MHz, 14MHz, 15MHz, 20MHz, 24MHz and 28MHz, all of which are available in the HackRF One (see: hackrf/firmware/common/max2837.c). Even though the 24MHz and 28MHz ones will never be used, at least not in the H1. There is nothing stopping you from selecting a lower sample rate below 2MSPS, but because there is no smaller analogue filter, you will end up with some nasty overlapping alias images of unwanted in band and out of band signals.
 
Question   24: How much power does the HackRF One need to function ?
Answer     24: The USB 2.0 specification is 500mA at 5 volts, and the HackRF says that it needs this much to function correctly https://github.com/mossmann/hackrf/wiki/FAQ#q-8. But since there is 50mA at 3.3 volts available for software-controlled antenna port power, this suggests that a HackRF One should be able to function perfectly well with only 467mA (If there is no power requirement for a LNA on a remote antenna).

Question   25: Where can I find example flowgraphs files for gnuradiocompanion ? Is there a repository of examples somewhere ?
Answer     25: The two places I would begin if looking for examples would be https://github.com/argilo/sdr-examples and http://www.oz9aec.net/index.php/grc-examples. Then I would search for additional flowgraphs in most search engine with "site:github.com filetype:grc" or "site:gnuradio.org filetype:grc" or just "filetype:grc" and whatever other search term that you are looking for an example.

Question   26: How do I open the plastic cover of the HackRF One ?
Answer     26: Remove all three SMA nuts and then use a guitar pick, or a credit card, along one side of the HackRF One from below (see this picture, which should help make it clear). 
Extra info 26: There are some excellent photos of the HackRF One at https://github.com/fd0/hackrf-one-pictures ( and Jawbreaker at https://github.com/fd0/jawbreaker-pictures ).


Question   27: I'm trying to use the HackRF to record some signals with very tight frequency requirements, but there appears to be a lot of frequency drift. Is there any way that I can reduce this or get rid of it altogether ?
Answer     27: Even atomic clocks have drift, there is no way to get rid of it totally. But it can be reduced. Basically there are a number of solutions to get less drift and they almost all revolve around having a more stable clock plugged into HackRF Clock IN port (after signal conditioning to match exactly what the HackRF One expects).
10MHz GPSDO (GPS disciplined oscillator), Trimble Thunderbolt or clock-tamer-GPS (typical 0.05ppm).
10MHz Rubidium Frequency Standard (typically 0.00005 ppm)
A custom circuit could be built that uses a "10Mhz OCXO" (0.01ppm) or even a DOCXO (0.0004ppm).
 Extra info 27: There are three quartz crystals in the HackRF: One at 2^15Hz for the RTC; One for the USB bus to allow DFU (if the H1 was ever bricked during a firmware upgrade) and finally one at 25MHz which everything else is clocked from.  The drift is caused by this X1(CX3225GB25000D0HEQZ1) (30 ppm). So any external reference clock that provides a 0 volt to 3 volt square wave at 10MHz, that is better than 30 ppm stability will reduce the drift in the HackRF. But most of the short term drift in a crystal is caused by temperature changes. As the Xtal warms up it's frequency changes. So a cheap way to stabilise the clock drift a tiny bit is to heat the HackRF up by running it for 10 minutes, to warm up, before sampling your signal of interest. It will still drift, but not as much.

Question   28: I have a 7m length of wire, as my antenna, connected to a ham-it-up upconverter which is connected to my HackRF, how come I can not receive AM radio stations. My tiny cheap AM/FM radio picks up AM station no problem, and it doesn't have a 7m antenna.
Answer     28: Antenna size is proportional to wavelength. AM radio band has rather long wavelengths. If the frequency is about 300KHz then the full wave length would be 1000 meters (a quarter of this is about 250 meters). Most AM radios have a very long copper wire wrapped around a ferrite core inside. Try using a 75m antenna and you will probably pick up some AM stations.

Question   29: Can I use a Raspberry Pi Generation 2 model B with the HackRF One ?
Answer     29: Short answer: No. Long answer: The main deficiency is the USB core of the Broadcom SOC, plug "RPi usb split transaction" into a search engine and read. The bottom line is that when it comes to moving large amounts of data around fast the RPi would be near the bottom of any performance chart. The secondary problem with the RPi is its single USB bus, it is a design deficiency. Cheap was the design criteria and never performance. There are many things that it is good for, this is not one of them. In saying all that if all you want to do is upgrade the firmware on your HackRF One and nothing else, then any RPi hardware has enough performance for that task alone.

Question  30: How can I check if my external clock has been selected by the HackRF ?
Answer    30: If you read a document called Si5315 AN619, the answer is hidden within it and the design of the hackrf. You can just use the following command "hackrf_si5351c -n 0 -r" if 0x51 is returned then internal XTAL is active, if 0x01 is returned then CLKIN is active.

Question  31: How can I convert a file captured with hackrf_transfer into a cfile for use with inspectrum ?
Answer    31: The sox audio application in UNIX can do the conversion "sox -t s8 input_file -t f32 output_file"


Useful Links:

https://github.com/mossmann/hackrf/wiki/FAQ
http://www.rtl-sdr.com/big-list-rtl-sdr-supported-software/
http://www.sigidwiki.com/wiki/Signal_Identification_Guide